This guide will walk you through the steps to manage your product inventory in HubSpot using the Products Module. Follow these simple instructions to streamline your inventory management process.
Setting Up and Using the Products Module
1. Access the Products Module:
- Log in to your HubSpot account.
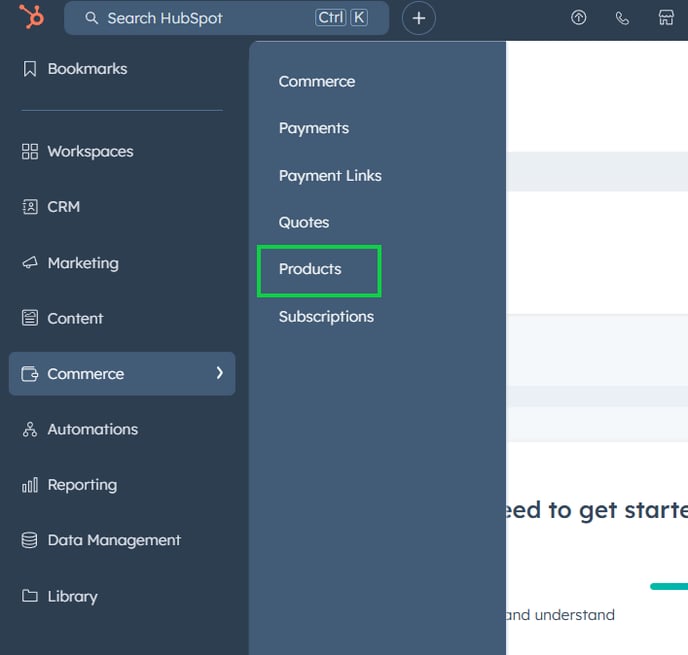
- In the main navigation bar, go to the "Commerce" tab.
- From the dropdown, click on Products to access the Products Module.
2. Add a New Product:
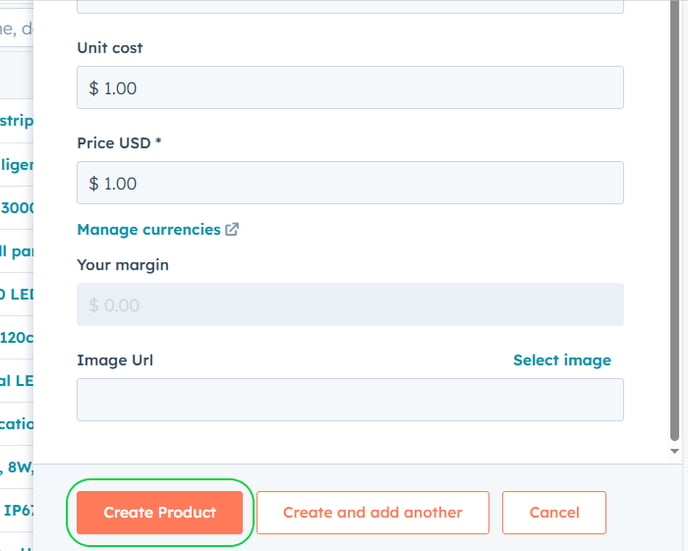
- Click the "Create Product" button.
- Fill in the product details such as name, SKU, price, and description.
- Add any custom properties that are relevant to your inventory management.
- Once all fields are filled in, click "Create Product" to add the product to your inventory.
3. Edit an Existing Product:
- Navigate to the "Products" tab within the Commerce section.
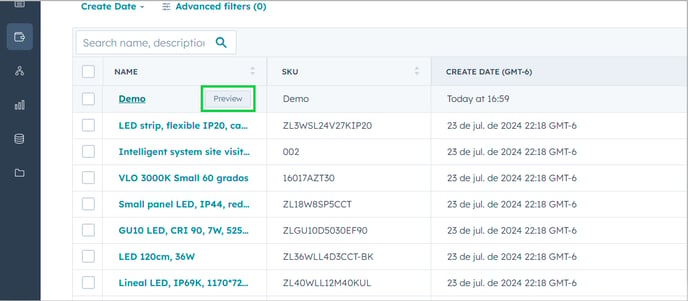
- Find the product you want to edit by scrolling or using the search bar.
- Click on the product’s name to open its details for editing.
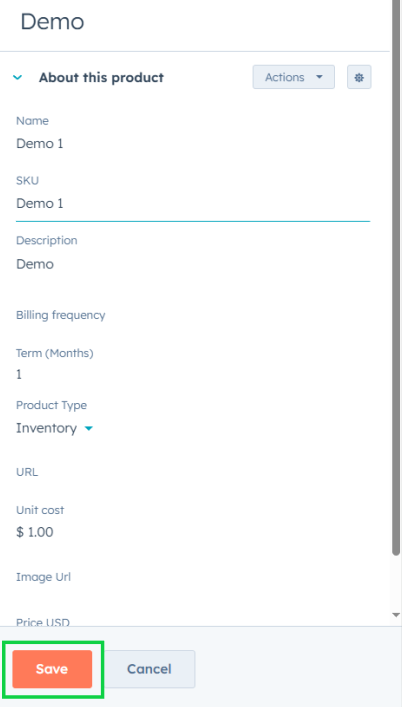
- Make the necessary changes to the product details such as the name, SKU, price, or any other relevant fields.
- Once you’ve updated the necessary information, click "Save" to apply the changes.
Tracking Product Inventory
1. Use Custom Properties:
- To track inventory levels, you can create custom properties for your products in HubSpot.
- Go to "Settings" (gear icon) in the main navigation bar to access the custom properties section.

- In the left sidebar menu, navigate to Data Management > Properties.
- Under Select an object, choose Product Properties.
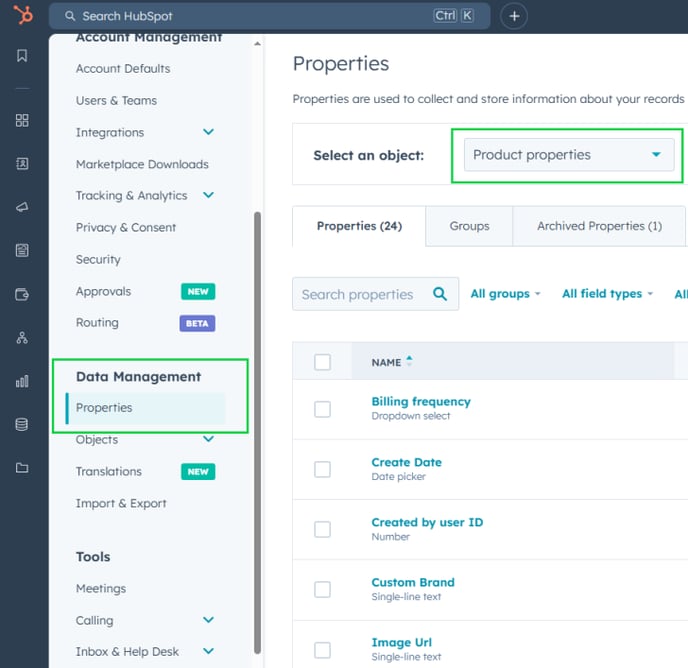
- Click Create a property and define properties such as Current Inventory, Reorder Level, and Inventory Status.
2. Update Inventory Levels:
- Whenever products are sold or restocked, update the inventory levels in the custom properties you’ve created.
- This allows you to track product availability and manage stock levels directly within HubSpot.
3. Set Up Inventory Alerts:
- Use HubSpot workflows to create alerts when inventory levels fall below a certain threshold.
- Navigate to Automation > Workflows in the HubSpot menu.
- Create a new workflow and set the trigger based on the Current Inventory property.
- Add actions to send notification emails or create tasks for restocking.
Adding Data to a Dropdown Menu
1. Create a Custom Property with a Dropdown Field:
- Navigate to "Settings" (gear icon).
- In the left sidebar menu, navigate to Data Management > Properties and define the object as Product Properties.
- Click Create a Property.
- Choose Dropdown select as the field type.
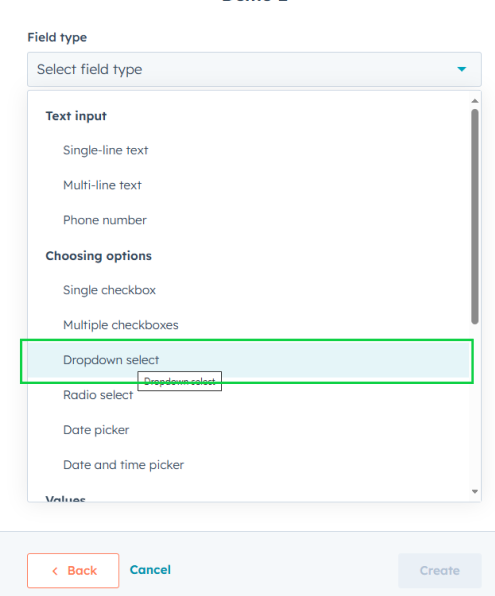
- Name your property and add the dropdown options relevant to your inventory management (e.g., Product Category, Supplier, Warehouse Location).
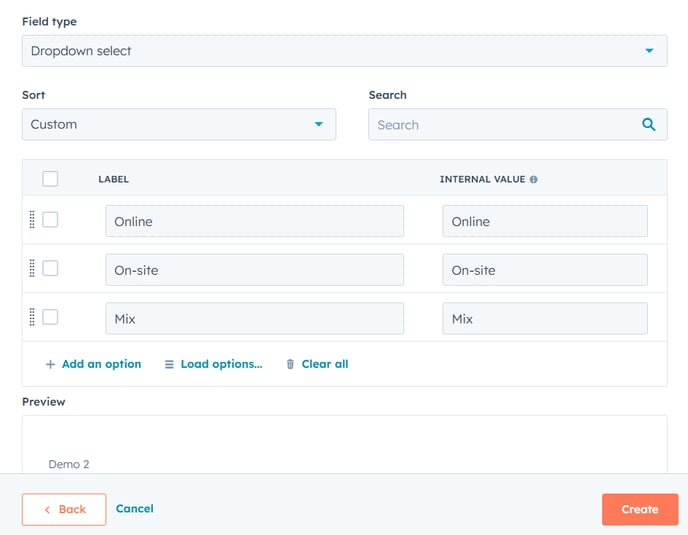
2. Edit Dropdown Options:
- To add or modify options in an existing dropdown property, go to Settings (gear icon).
- In the left sidebar menu, navigate to Data Management > Properties and select the object as Product Properties.
- Find the custom property with the dropdown field you want to edit and click on the More button.
- Select Edit to modify existing options or add new ones
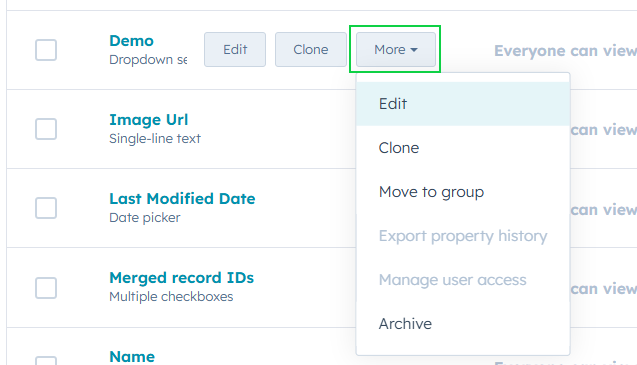
- Edit the options by adding, removing, or renaming them as needed.
- Click Save to update the dropdown menu.
Conclusion:
Managing custom properties in HubSpot, like dropdown fields, helps you efficiently track product details and inventory. By following these steps, you can easily update product information and set up alerts to stay on top of stock levels. This makes managing your inventory simpler and more organized within HubSpot.