No matter if you're working with tickets or deals in HubSpot, sending an email to your customers is easy. Follow this step-by-step guide to quickly send emails directly from HubSpot CRM.
HubSpot is a CRM platform that helps businesses manage customer interactions, including sending emails directly from tickets or deals. If you’re new to HubSpot, this guide will walk you through the steps to send an email quickly and easily, ensuring your communications are tracked within the CRM. You can send an email to a customer directly from a ticket or deal in HubSpot, follow these steps:
-
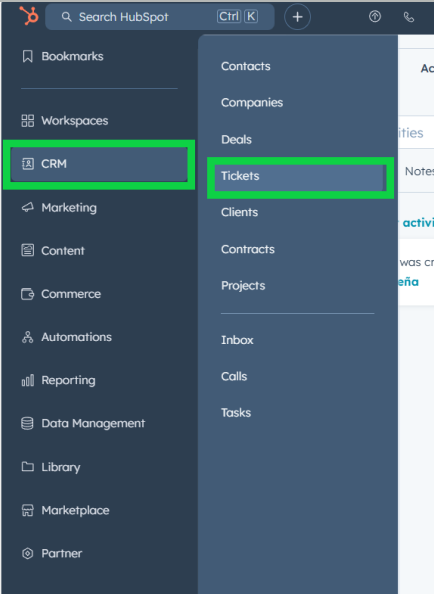
Navigate to CRM:
- Log in to your HubSpot account.
- In the top navigation menu, hover over the CRM tab.
- From the drop-down menu, click on Tickets if you’re working on customer support cases, or choose Deals if you’re managing a sales deal.
-
Select the Ticket:
- Find the ticket for which you want to send an email to a customer by navigating to the ticket list.
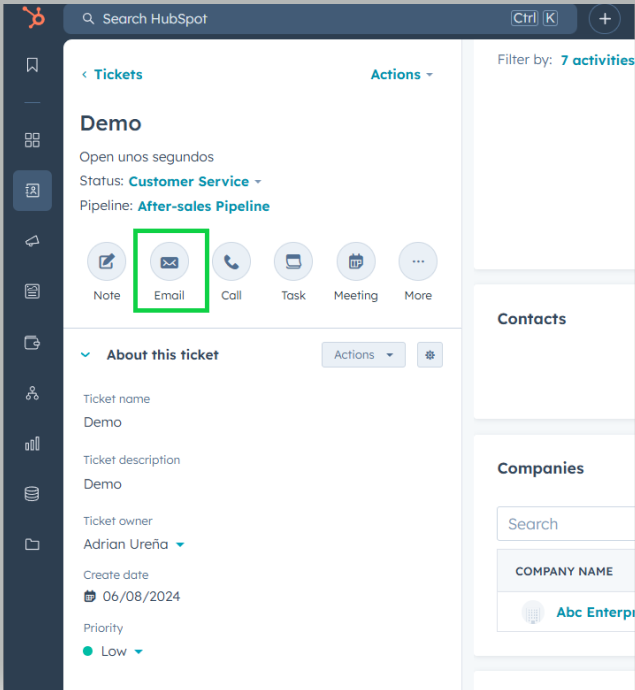
- Click on the ticket to open its details. This will take you to the full ticket view where you can see more information about the request.
-
Compose an Email:
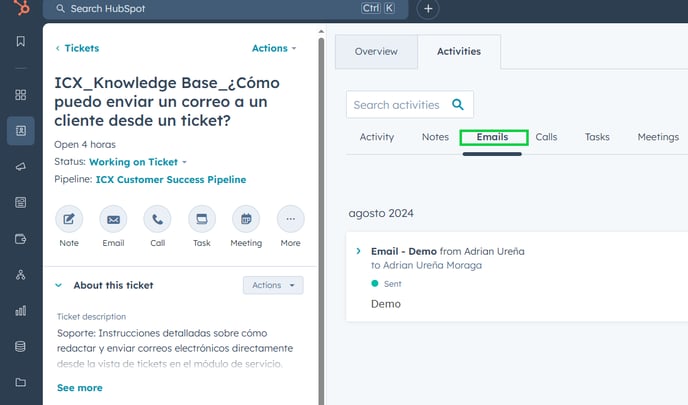
- In the detailed ticket view, you will see the Email button among other options (Note, Call, Task, Meeting).
- Click the "Email" button to open the email editor, where you will be able to draft your message to the customer.
-
Write Your Email:
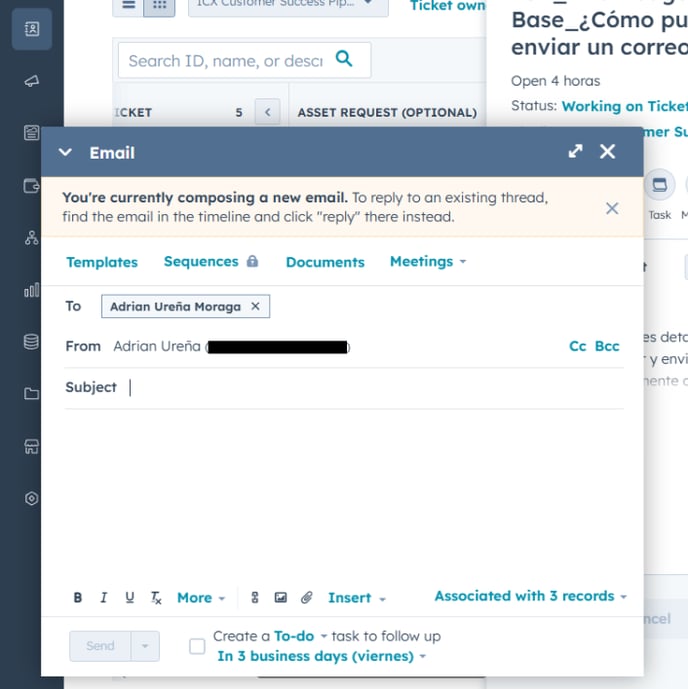
- A new email editor will appear on your screen, allowing you to draft your message.
- Enter the recipient’s email address if it’s not already pre-filled, then add a subject line and write the body of your email.
- Use formatting tools to style your email, or insert links, images, and attachments as needed. These options are available at the bottom of the editor to help you customize your message.
-
Use Templates (Optional):
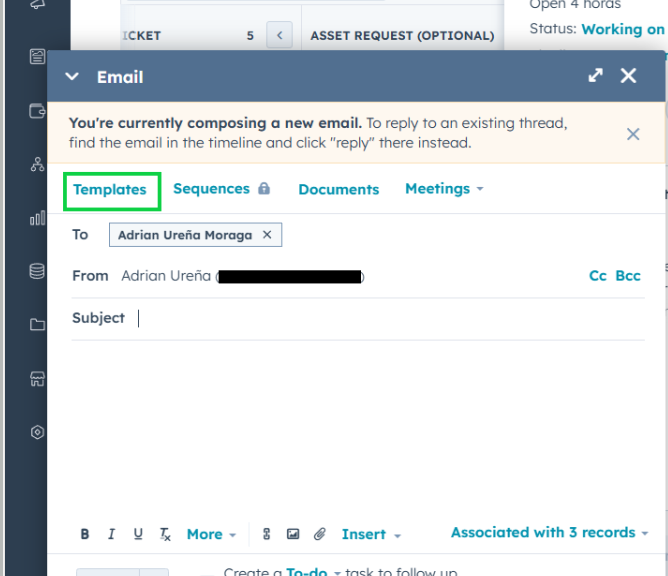
- To save time, you can choose from pre-defined email templates.
-
- Click "Templates" in the email editor to access a library of templates that you can select and customize for your message.
- Select the appropriate template from the list.
-
Send the Email:
- Once you have composed your email, review the content to ensure everything is correct.
- Click the "Send" button at the bottom of the email editor to send the email to the recipient.
-
Track the Email:
- After sending, the email will appear in the ticket’s timeline under the "Emails" tab.
- You can track the email’s status, such as whether it was delivered, opened, or replied to, directly within the ticket. This allows you to easily monitor the progress of your communication with the customer and follow up when needed.
Conclusion:
Sending emails to your customers directly from HubSpot is a simple and efficient way to manage communication within your CRM. By following the steps outlined in this guide, you can easily send, track, and manage emails from both tickets and deals, ensuring that all interactions with your customers are recorded in one place. HubSpot’s integrated email tracking features allow you to stay on top of customer responses, making it easier to follow up and maintain strong relationships.